Supported Features
The Okta/Splashtop Secure Workspace integration currently supports the following features:
- SAML
- SP-initiated SSO
- OIDC
- SP-initiated SSO
- SCIM
- Create users
- Update user attributes
- Deactivate users
- Group push
For more information on the listed features, visit the Okta Glossary.
Configuration Steps
OKTA SAML setup
Step 1: Accessing the Identity Providers Section
- Log in to your Splashtop Secure Workspace admin account using your credentials.
- Navigate to the Settings tab.
- Click on the Identity Providers section.
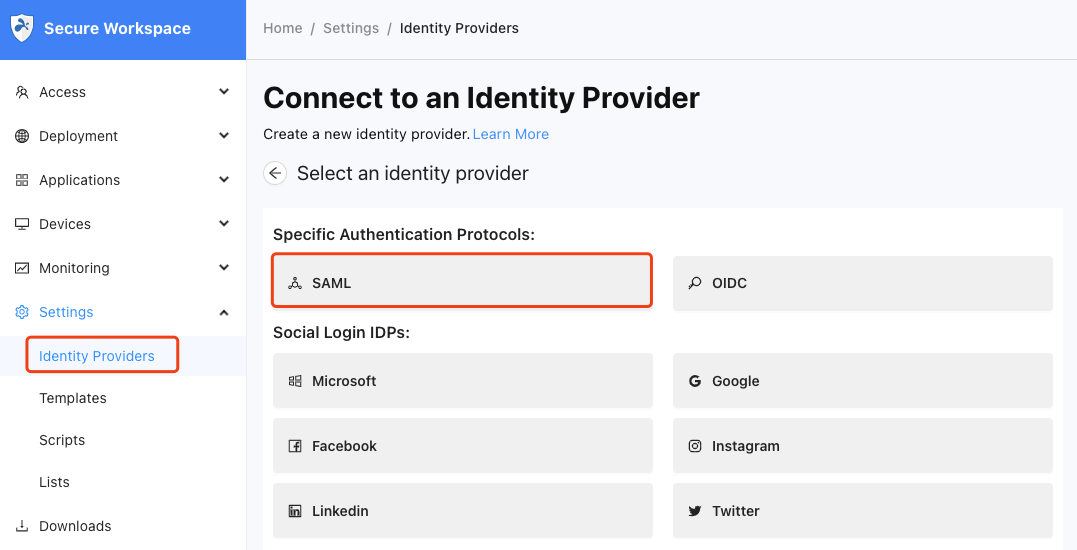
Step 2: Adding a New SAML IDP
- In the Identity Providers section, click on the Add New button.
- Select SAML from the available options.
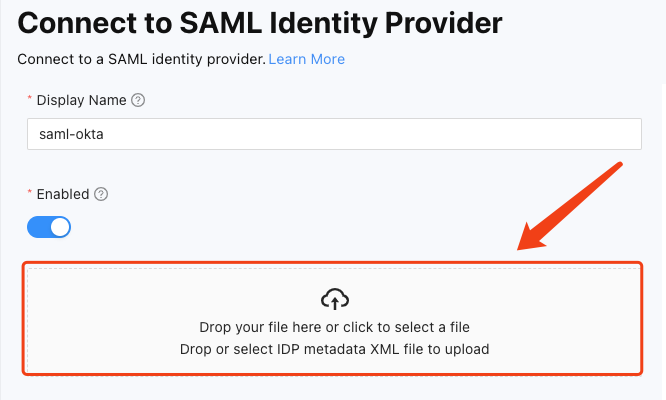
Step 3: Configuring the SAML IDP
- Enter the Display Name for the SAML IDP.
- Set the Enabled option to enable the SAML IDP.
- In the upcoming steps, we will utilize the Redirect URL and Entity ID located in the upper right corner of the page.
- Open a new tab to log in to the OKTA admin portal to open Applications → Browse App Catalog → Search for Splashtop Secure Workspace → Choose Splashtop Secure Workspace → Add Integration
- After add the Application label go to next page, then select SAML 2.0, fill in the Redirect URL and Entity ID we get in previous step, and change Application username formate to Email then click the Done button.
- After the Application is created, go to Sign On tab → SAML Signing Certificates → choose the Active cert → View IdP metadata
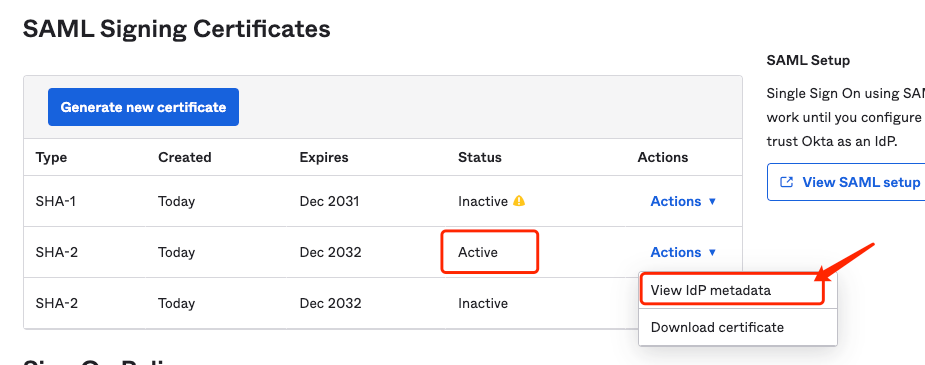
-
Open it in a new tab and then save it as metadata.xml
-
Go to Assignments → assign the people/groups you like to assign to access the Splashtop Secure Workspace.
-
Go back to the Splashtop Secure Workspace IDP config page, dragging and dropping the IDP metadata XML file just saved. This action will automatically populate the Single sign-on URL and Signing certificate fields. Click Save
-
Log out of the Splashtop Secure Workspace, and the SAML login button will show up, use the assigned OKTA user to login
Step 4: OKTA SAML-SCIM setup
-
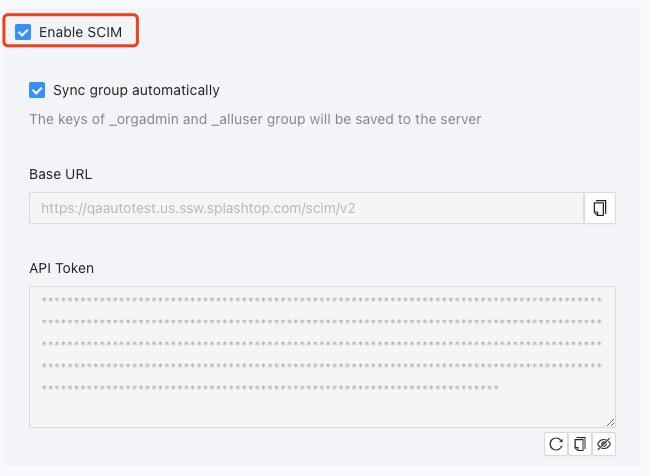
Enable SCIM Splashtop Secure Workspace IDP config page
- Create or edit the created IDP in Splashtop Secure Workspace → settings → Identity Providers, check SCIM to enable this function (enable Sync group automatically to allow push group function sync group to Splashtop Secure Workspace automatically).
- When you check it, the system will display the Basic URL and API Token, which will be used in the next steps.
- Click Save to implement the change.
-
In OKTA App config SCIM
- In the created Okta app, Provisioning → Configure API Integration
- Check Enable API integration
- Fill in the URL and token obtained in previous step.
- Then Test API Credentials → then Save
- Save after the Test is successful
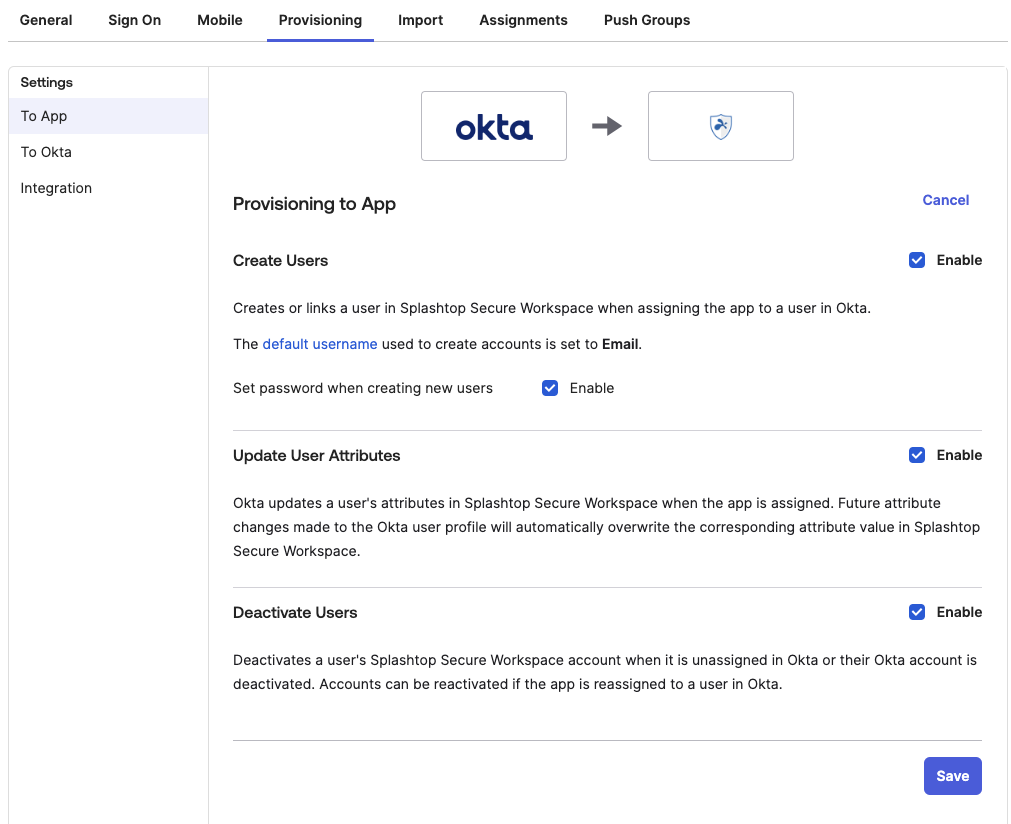
- Go to the Provisioning page → To App
- Enable following: Create Users, Update User Attributes, Deactivate Users and Save.
-
Assignments
- Open the created App in OKTA and select Assignments.
- You can assign users to this App individually, or select an entire group to assign its internal users to this App, click the Assign button in the upper left corner, and select Assign to Groups to assign by group
-
Push Groups
- In Push Groups tab, click the Push Groups to select the groups you’s like to push to Splashtop Secure Workspace
- After the Push Status become Active, the push groups is done.
OKTA OIDC setup
Step 1: Accessing the Identity Providers Section
- Log in to your Splashtop Secure Workspace admin account using your credentials.
- Navigate to the Settings tab.
- Click on the Identity Providers section.
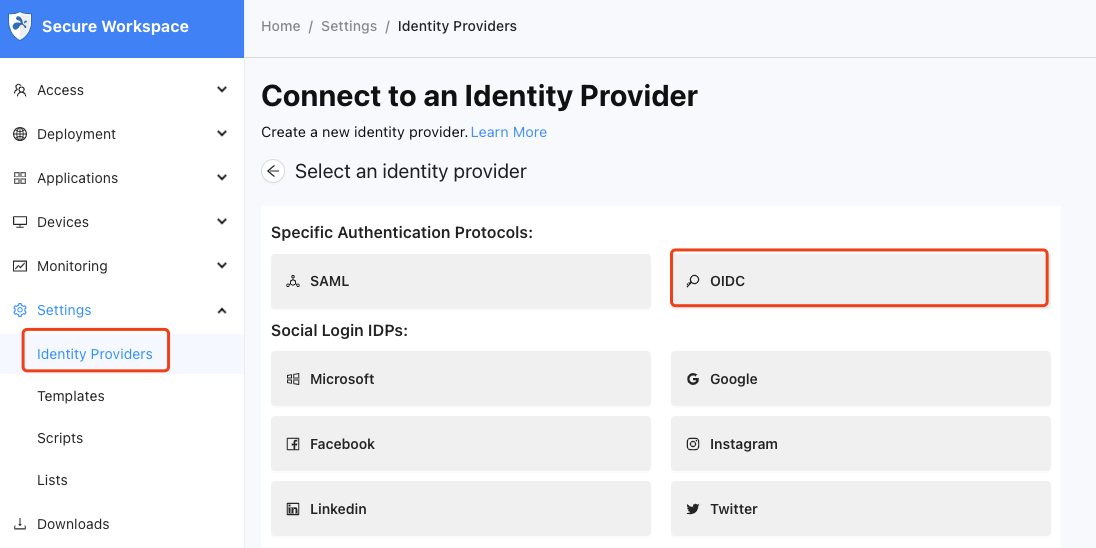
Step 2: Adding a New OIDC IDP
- In the Identity Providers section, click on the Add New button.
- Select OIDC from the available options.
Step 3: Configuring the OIDC IDP
- Enter the Display Name for the OIDC IDP.
- Set the Enabled option to enable the OIDC IDP.
- In the upcoming steps, we will utilize the Redirect URL located in the upper right corner of the page.
- Open a new tab to log in to the OKTA admin portal to open Applications → Browse App Catalog → Search for Splashtop Secure Workspace → Choose Splashtop Secure Workspace → Add Integration
- After add the Application label go to next page, then select OpenID Connect, fill in the Redirect URL (OIDC) we get in previous step, and change Application username formate to Email then click the Done button.
- After the Application is created, go to Sign On tab, copy the Client ID and Client secret to fill in them the Splashtop Secure Workspace Identity Providers config page.
- Go to Assignments → assign the people/groups you like to assign to access the Splashtop Secure Workspace.
- For the Authorization url and Token url you need to get them from the https://${your_okta_domain}/.well-known/openid-configuration
- To look for:
authorization_endpointandtoken_endpoint - eg. https://dev-98112303-admin.okta.com/.well-known/openid-configuration
- authorization_endpoint → Authorization url:
https://dev-98112303.okta.com/oauth2/v1/authorize - token_endpoint →Token url:
https://dev-98112303.okta.com/oauth2/v1/token
- authorization_endpoint → Authorization url:
- To look for:
- Now the OIDC configuration is done, log out of the Splashtop Secure Workspace, and the OIDC login button will show-up, use the assigned OKTA user to login
Step 4: OKTA OIDC-SCIM setup
-
Enable SCIM Splashtop Secure Workspace IDP config page
- Create or edit the created IDP in Splashtop Secure Workspace → settings → Identity Providers, check SCIM to enable this function (enable Sync group automatically to allow push group function sync group to Splashtop Secure Workspace automatically).
- When you check it, the system will display the Basic URL and API Token, which will be used in the next steps.
- Click Save to implement the change.
-
In OKTA App config SCIM
- In the created Okta app, Provisioning → Configure API Integration
- Check Enable API integration
- Fill in the URL and token obtained in previous step.
- Then Test API Credentials → then Save
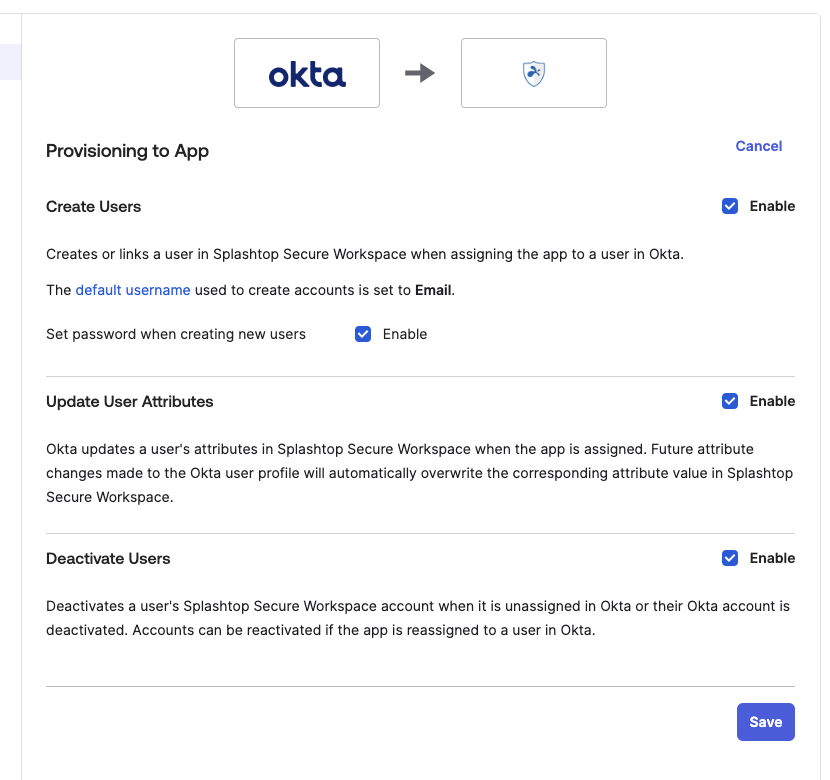
-
Then come to the provisioning page, click edit, enable the functions: Create Users, Update User Attributes, Deactivate Users and then Save
-
Assignments
- Open the created App in OKTA and select Assignments.
- You can assign users to this App individually, or select an entire group to assign its internal users to this App, click the Assign button in the upper left corner, and select Assign to Groups to assign by group
-
Push Groups
- In Push Groups tab, click the Push Groups to select the groups you’s like to push to Splashtop Secure Workspace, then click Save
- After the Push Status become Active, the push groups is done.