Creating a Secrets Policy allows you to control read, write, and administrative access to secrets when the policy is assigned. Follow the steps below to create a new Secrets Policy:
Step 1: Accessing the Secrets Manager
- Log in to your Splashtop Secure Workspace admin account with your credentials.
- Navigate to the Secrets Manager section.
Step 2: Accessing Policies
- Within the Secrets Manager section, click on the Policies tab.
- Click on the Add New button to create a new Secrets Policy.
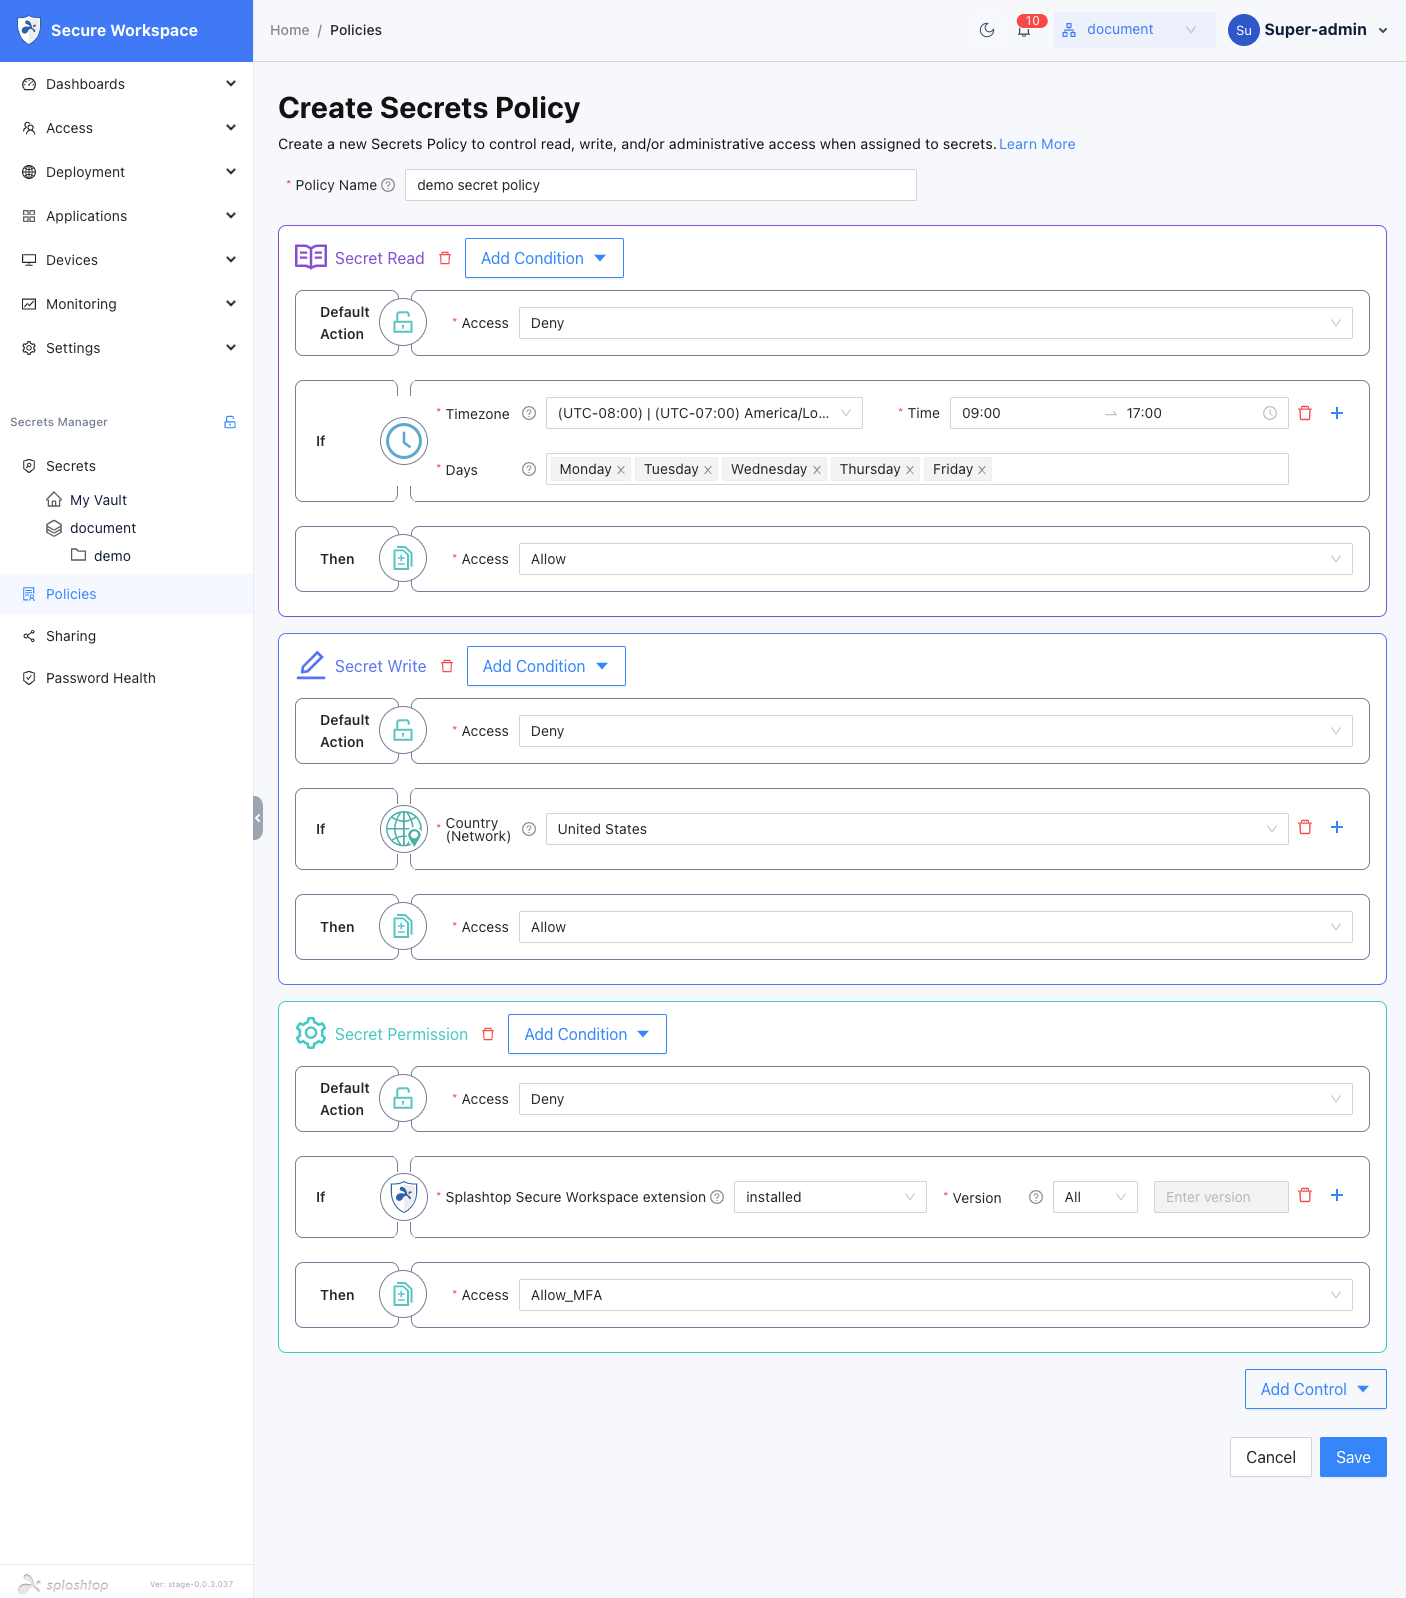
Step 3: Defining the Policy
- Provide a Policy Name for the Secrets Policy.
- Add the desired controls by clicking on the Add Control button.
- Choose the type of control you want to add, such as Secret Read, Secret Write, or Secret Permission.
- Set the Default Action for the control, which can be Allow, Allow_MFA, or Deny.
- Add any necessary If conditions by clicking on the Add Condition button.
- Select the type of condition you want to add, such as Date and Time, Location, Network, Browser, Extension, or OS.
- Define the specific conditions for each type, such as specific dates and times, country locations, IP addresses, browser names, extension names, or operating system names.
- Set the desired action (Allow, Allow_MFA, or Deny) for the condition is met.
- Repeat steps 3-8 to add additional controls and conditions as needed.
Step 4: Review and Save
- Review the entered information to ensure accuracy.
- Click on the Save button to create the Secrets Policy.
- By default, the Secrets Policy will be in an active state. Locate the newly created Secrets Policy in the list and deactivate it by clicking on the corresponding Enabled button.