To enable "Remote Applications" control for RDP application in SSW, the administrator will need to:
- Install Remote Desktop Services on the target machine, which is running Windows Server.
- Update the group policy.
Install Remote Desktop Services (RDS) on a Windows Server
-
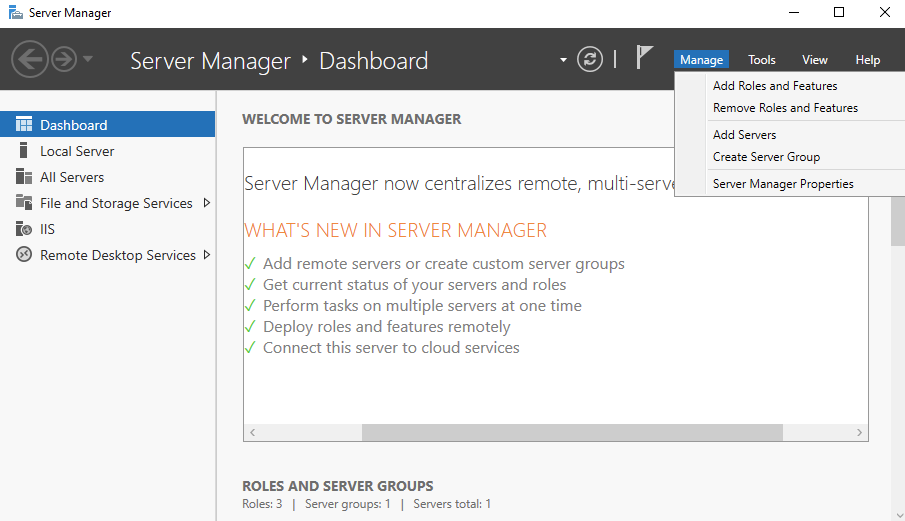
Open Server Manager: Press
Windows Key + Xand select "Server Manager" from the menu. -
Add Roles and Features: In Server Manager, click on "Manage" at the top-right corner, and then select "Add Roles and Features."
-
Before You Begin: Review the information and click "Next."
-
Installation Type: Select "Role-based or feature-based installation" and click "Next."
-
Server Selection: Choose the server where you want to install Remote Desktop Services and click "Next."
-
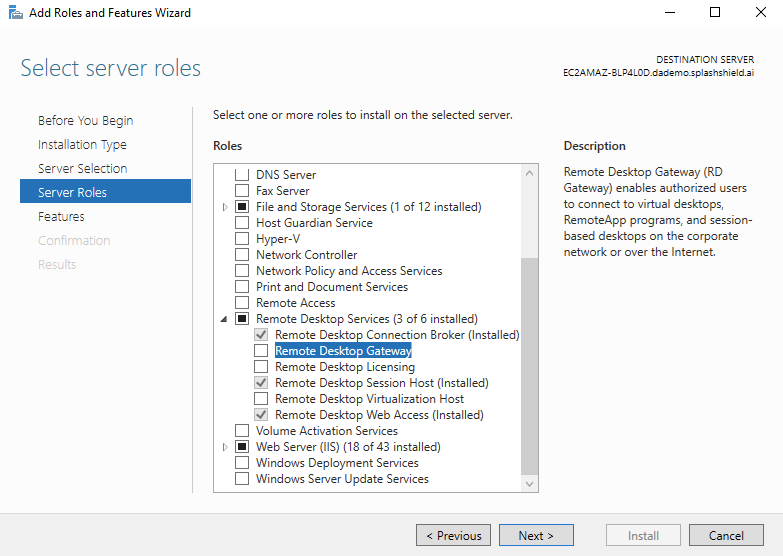
Server Roles: Scroll down, locate "Remote Desktop Services," and check the box next to it. A dialog box will appear, click on "Add Features" to add the required features for Remote Desktop Services. Click "Next."
-
Role Services: Select the role services you want to install:
- Remote Desktop Session Host: Allows multiple users to connect remotely to the server.
- Remote Desktop Licensing: Manages the licenses for RDS connections.
- Remote Desktop Gateway: Allows users to connect to internal network resources securely over the internet.
- Remote Desktop Web Access: Provides access to RemoteApp programs, session-based desktops, and virtual desktops through a web browser.
- Remote Desktop Connection Broker: Manages connections to virtual desktops and RemoteApp programs.
- Remote Desktop Virtualization Host: Manages virtual desktops.
Ensure that the "Remote Desktop Session Host", “Remote Desktop Web Access”, “Remote Desktop Connection Broker” options are chosen. Select the role services based on your needs, then proceed by clicking "Next.”
-
Confirmation: Review the selections and click "Install" to begin the installation process.
-
Installation Progress: Wait for the installation to complete. Once done, click on "Close" to finish the wizard.
Update group policy
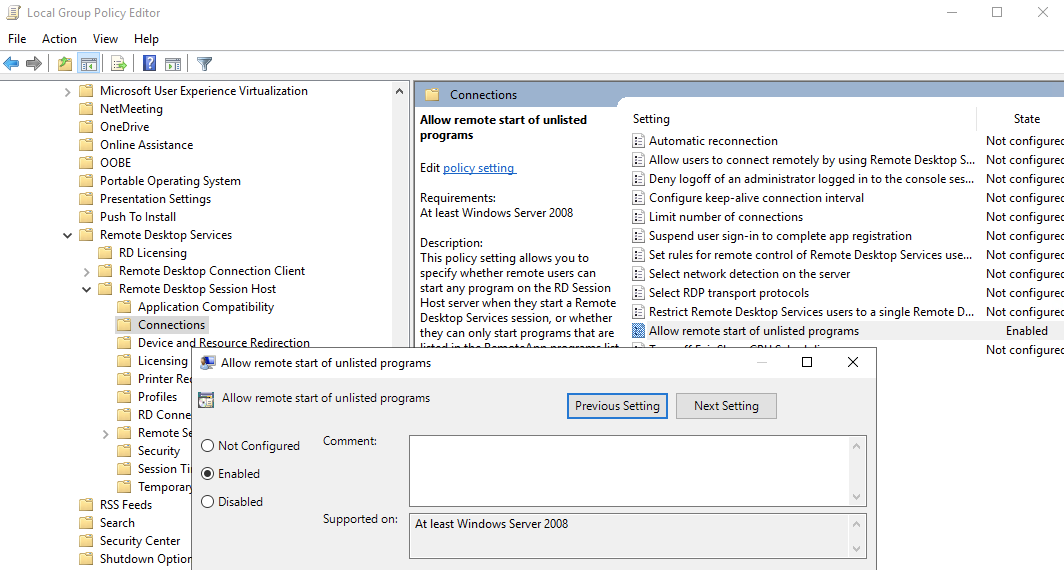
- Enable Allow remote start of unlisted programs: Following the installation of RDS, it is necessary to activate the "Allow remote start of unlisted programs" policy. This action permits the Initial program to initiate unlisted programs on the Windows Server:
-
Open Group Policy Editor: Press
Windows Key + R, typegpedit.msc, and press Enter. -
Navigate to the Policy: In the Group Policy Editor, go to
Computer Configuration>Administrative Templates>Windows Components>Remote Desktop Services>Remote Desktop Session Host>Connections. -
Enable the Policy: Double-click on the policy named "Allow remote start of unlisted programs" to edit it.
-
Configure the Policy: Select the "Enabled" option to allow remote start of unlisted programs.
-
Apply Changes: Click on "Apply" and then "OK" to save the changes.
-
- Restart: Depending on the roles and features you installed, you may need to restart the server to complete the setup.
Once the installation and configuration process is finished, Remote Desktop Services should be activated on your Windows Server. This enables users to remotely connect and utilize the Initial program feature to launch any desired program.