The following steps will guide you through the process of adding a SAML Identity Provider (IDP) in Splashtop Secure Workspace.
Step 1: Accessing the Identity Providers Section
- Log in to your Splashtop Secure Workspace admin account using your credentials.
- Navigate to the Settings tab.
- Click on the Identity Providers section.
Step 2: Adding a New SAML IDP
- In the Identity Providers section, click on the Add New button.
- Select SAML from the available options.
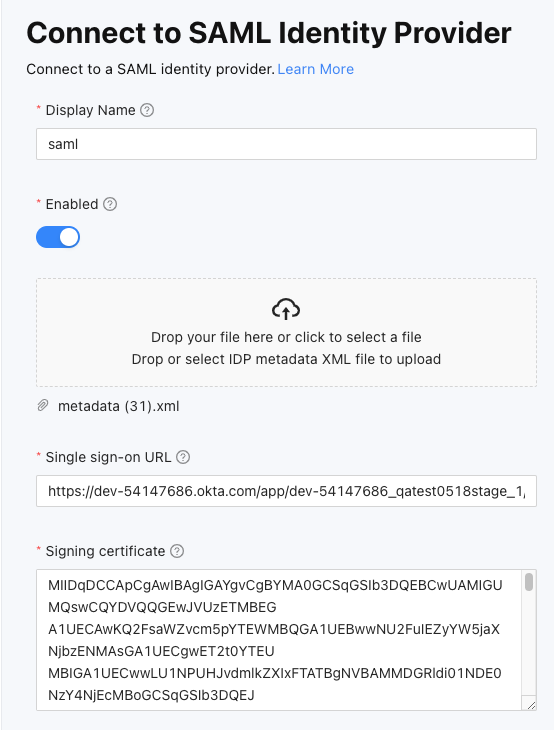
Step 3: Configuring the SAML IDP
- Enter the Display Name for the SAML IDP.
- Set the Enabled option to enable the SAML IDP.
- Provide the Single sign-on URL, which is the URL to send the SAML authentication requests to.
- Specify the Signing certificate, which is the X509 certificate used to verify the signature in the SAML authentication response.
- Additionally, users have the option to simplify the process by dragging and dropping an IDP metadata XML file. This action will automatically populate the Single sign-on URL and Signing certificate fields, saving time and ensuring accuracy in the configuration process.
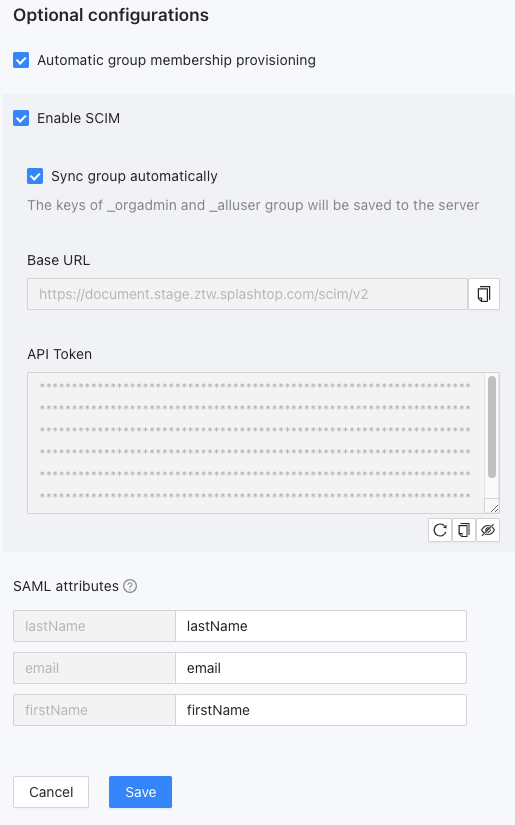
Optional Configurations
- Automatic group membership provisioning: Enable this option to automatically provision group membership based on SAML attributes.
- Enable SCIM: If enabled, additional options will be provided for SCIM configuration.
- Sync group automatically: After enabling this option, the specified group will be automatically synchronized with SSW.
- Please note that after enabling SCIM and automatic group syncing, the keys of the
_orgadminand_allusergroups will be saved to the server. - Base URL: A provided URL for OIDC configuration.
- API Token: A provided API token for OIDC configuration. This token will take effect after saving the IDP.
- Please note that after enabling SCIM and automatic group syncing, the keys of the
- Sync group automatically: After enabling this option, the specified group will be automatically synchronized with SSW.
- SAML attributes: Add a list of SAML attribute names that will be added to your signed JWT token and can be used in SAML policy rules.
Step 4: Review and Save
- Review the entered information to ensure its accuracy.
- Click on the Save button to add the SAML IDP to SSW.
Additional Information
On the right part of the page, the following information will be displayed for reference:
- Redirect URL: The URL to redirect the authentication requests to your OIDC provider.