Adding private application in Splashtop Secure Workspace allows you to integrate and provide access to custom applications specific to your organization. Private applications are applications that are not pre-configured in the system and require manual setup.
IT Admin Preparation: Deploy Connectors
Before adding private applications, IT Admins need to deploy connectors within the organization's private network or private cloud. To do so, please follow the step-by-step guide provided at the following link: Deploy Connectors Guide.
Step 1: Accessing Applications Configuration
- Log in to your Splashtop Secure Workspace super admin account or org admin account using your credentials.
- Once logged in, navigate to the Applications menu.
- Select the Applications section to access the applications configuration page.
Step 2: Adding Private Applications
- On the applications configuration page, click on the Add Applications(s) button.
- From the options presented, choose Add Private Application.
Step 3: General Settings
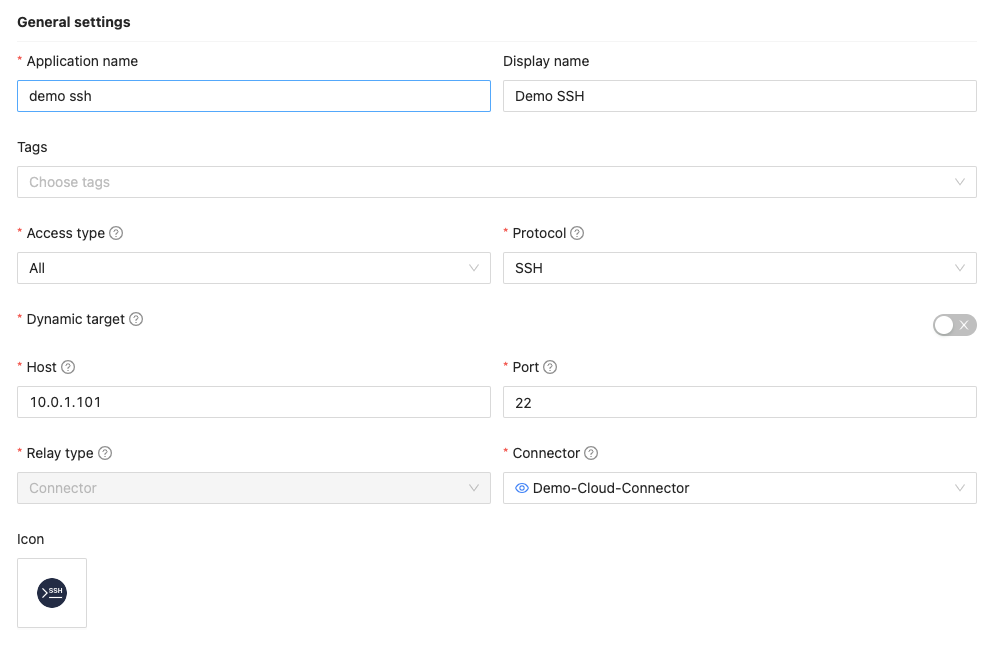
- In the General Settings section, provide the necessary information for the private application:
- Application Name: Enter a descriptive name for the application.
- Display Name: Specify the name that will be displayed to users within the system.
- Access Type: Choose whether users can access the application via a browser and/or via the SSW app.
- Protocol: Select the appropriate protocol for the application (e.g., VNC, RDP, SSH, HTTP, HTTPS, Telnet, Kubernetes, Splashtop, Custom).
- Tags: Attach existing tags or create a new tag to categorize and manage the application.
- To attach an existing tag, select it from the dropdown list.
- To create a new tag, enter the tag name and click the "Save" button.
- Icon: Choose an icon for the application from the system's built-in icons.
- Enter the following details for the private application:
- Dynamic Target: When enabled, users will be prompted to enter the target host and port each time they launch the app. Note that users will not need to input the host and port in the General Settings section when Dynamic Target is enabled.
- Host: Specify the hostname or IP address of the server to connect to.
- Port: Enter the port on which the server is listening.
- Configure the connectivity options for the private application:
-
Through Connector: Disable this option to use the Edge to connect to the private application. Note that when the host IP is on the LAN, you may not be able to choose "false" for this option.
-
Connector: Select a deployed connector if the application should be accessed through a connector.
-
Edge Location: If the Through Connector is false choose the Edge Location, which serves as the relay for this application. Select the location closest to the private application for optimal performance.
-
Add start uri (HTTP, HTTPS only): Enter the URI that users are redirected to after entering the application. Defaults to ‘/‘.
-
Step 4: Group & Policy
-
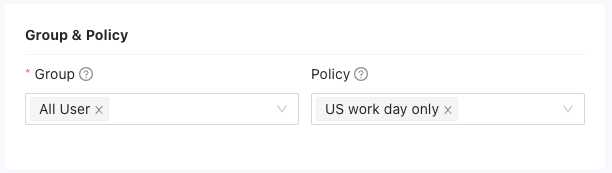
Define the groups and policies associated with the private application:
- Group Access: Select the user groups that should have access to the application.
- Application Policies: Set specific policies for the application, such as permissions, restrictions.You can follow the steps here to add application policy:
Step 5: Additional Configuration
Depending on the specific requirements of the private application, you may need to configure additional settings such as authentication methods, authorization roles, or custom integrations.
- Options: Security (RDP only)
The security options determine the level of security applied during an RDP session. Each option has a specific meaning:- Any: This generally means the security option isn't limited to a particular protocol and will utilize any available security mechanism for the RDP connection.
- NLA (Network Level Authentication): NLA mandates users to authenticate to the network before establishing a remote desktop connection. It enhances security by permitting only authenticated users to access the remote system.
- NLA-ext (Extended Network Level Authentication): This option builds upon NLA and introduces additional security enhancements to the authentication process.
- TLS (Transport Layer Security): TLS encryption secures the communication between the client and remote server. It encrypts transmitted data during the RDP session to prevent unauthorized access and data manipulation.
- VMConnect: VMConnect is a Hyper-V feature facilitating connection to virtual machines. Security mechanisms used depend on the virtual machine's configuration.
- RDP: This generally denotes a basic Remote Desktop Protocol connection without specifying a particular security option. Security levels may vary based on RDP settings and configurations.
Step 6: Dynamic Credentials (VNC, RDP, SSH, HTTP, HTTPS, Telnet, Kubernetes only)
-
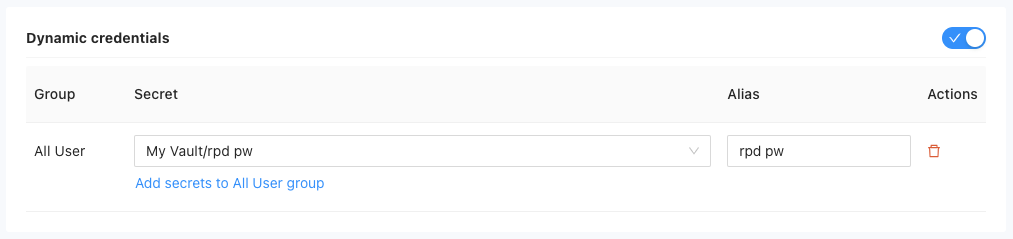
Enable Dynamic Credentials if necessary. Dynamic Credentials allow users to generate and manage their own application-specific credentials, such as API keys or tokens.
-
For each group allowed to access the private application, you can assign one or more saved secrets to the group for this private application. Users in the designated group will be able to use these saved secrets for authorization when they launch the application through the web interface. To do this:
a. Click on the "Add secret to {group_name} group" button.
b. Select the appropriate saved secret from the list. If you haven't created the necessary secret yet, follow these steps to create a new one:- Click the "Create New Secret" button, and a drawer for creating a new Zero Trust Application Secret will pop up.
- Provide the necessary details for the secret, such as the name, type of credentials, validity period, and any additional security options.
- Click "Save" to create the new secret.
c. Once you have the saved secret ready, click the "Add secret to {group_name} group" button to associate it with the designated group.
d. Set an alias for the saved secret to easily identify it when associating with the private application.
3. Users in the designated group can then access the private application using the credentials provided by the assigned saved secret when launching the application through the web interface.
Step 7: Support Link (Private & RBI Applications)
You can enable the Support Link feature to allow selected users or groups to generate and share a temporary access link for troubleshooting or collaboration purposes.
To enable Support Link for a private or RBI application:
- Toggle the Enable Support Link option.
- Under Permissions, define which users or groups are allowed to create and share a Support Link for this application.
Optional configurations:
- Secrets: Specify which saved secrets can be used when a Support Link is accessed.
- Passphrase Protection: Add a passphrase to enhance security for shared links.
Once configured, authorized users can generate a Support Link directly from the web interface to grant temporary, scoped access to the application.
Note: Only the creator can modify the Support Link. If you wish to overwrite existing data, please click the Reset button.
Step 8: Container (Kubernetes only)
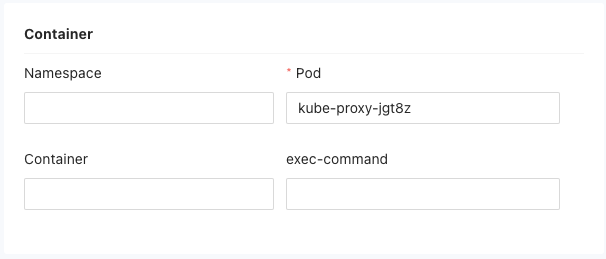
- If the private application protocol is Kubernetes, you can specify the following container-related details:
- Namespace: Enter the namespace in which the application resides.
- Pod: Specify the pod associated with the application (required).
- Container: Enter the name of the container within the pod.
- Exec Command: Optionally specify an execution command for the container
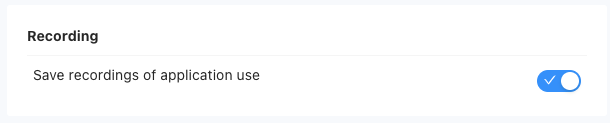
Step 9: Recording (VNC, RDP, SSH, Telnet, Kubernetes)
- If the private application supports recording and the access type is browser you can enable the option to save recordings of application use. You can find the recorded video in the Monitoring section Recording page.
Step 10: Live Session Monitoring (TELNET, SSH, K8S, RDP, VNC Only)
- Once this option is enabled, if the application has active sessions accessed from the browser, administrators can actively monitor the session in real-time. Locate the session under the Monitoring section on the Sessions page and click the
 button to initiate live monitoring.
Step 11: Confirm Active Session Termination ( RDP Olny)
- Enable this feature to warn users initiating a new RDP connection when another session is active on the target system. Administrators can configure specific user accounts or security groups to receive these alerts.
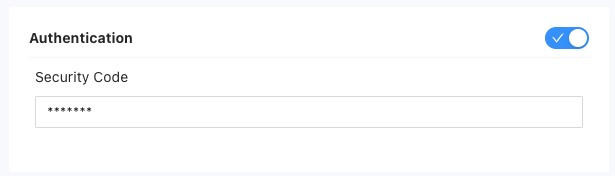
Step 12: Authentication (Splashtop only)
- If the private application protocol is Splashtop, you can configure the security code here.
Step 13: Advanced Options
- If the access type is Network, Advanced Options section will be available, you can configure additional settings for the private application:
- Max Network Session Duration (seconds): Specify the maximum duration of a network session for the application. The default value is 28,800 seconds.
- Interception URIs (HTTP, HTTPS only): Specify the URIs that should be intercepted by the application. This allows for additional security or customization measures.
Step 13: Saving and manage the application
- Once you have defined the private application settings, click on the Save button to create the application.
- The application will be created and added to the list of applications.
- By default, the application will be in an active state. Locate the newly created application in the list and deactivate it by clicking on the corresponding Enabled button.
How to enable “Remote Applications” control for RDP application
How to enable the remote application isolation
Installing and Enabling OpenSSH on Windows
Add Discovered Applications