Creating a new group in Splashtop Secure Workspace allows you to effectively organize and manage users with shared interests or responsibilities. Follow the steps below to create a new group.
Step 1: Access Group Management
- Log in to your Splashtop Secure Workspace super admin account using your credentials.
- Once logged in, navigate to the Access menu and select Groups.
Step 2: Add a New Group
- On the Groups page, locate the Add Group button.
- Click on the Add Group button to proceed.
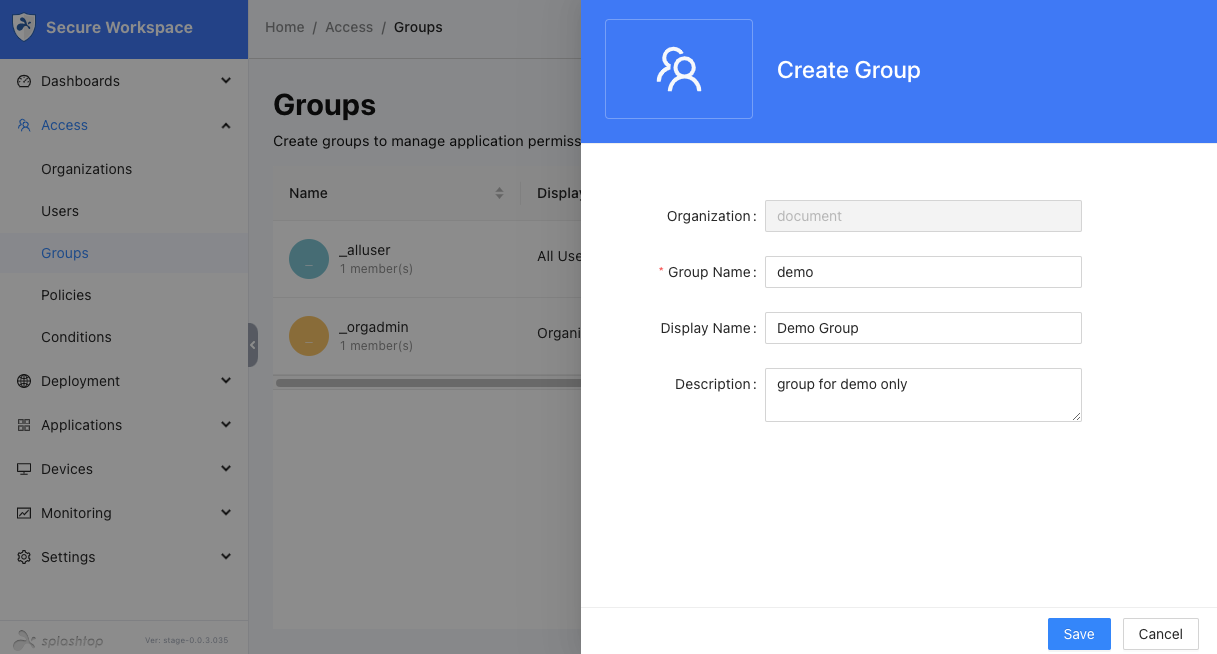
- Fill in the required information:
- Group Name: Enter a unique and descriptive name for the group.
- Display Name (optional): Specify a name that will be visible to users within the system.
- Description (optional): Provide a brief description or purpose of the group.
-
Review the entered information to ensure accuracy.
-
Click on the Save button to create the new organization.
Step 3: Managing Group Users
- After creating the group, you can manage its users by clicking the Manage Users button in the Actions column.

2. Explore the available options to further customize the group:
- To assign new members, click the Assign New Members button. It will display the available users that can be added to the group. Click the Assign button to add a user to the current group.
- To delete a user or update their profile, utilize the respective options provided.